cs2 in blender
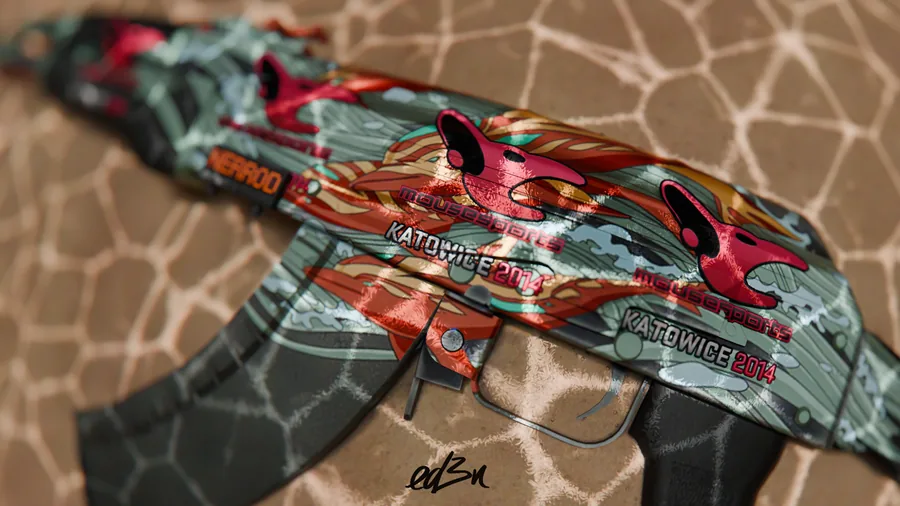
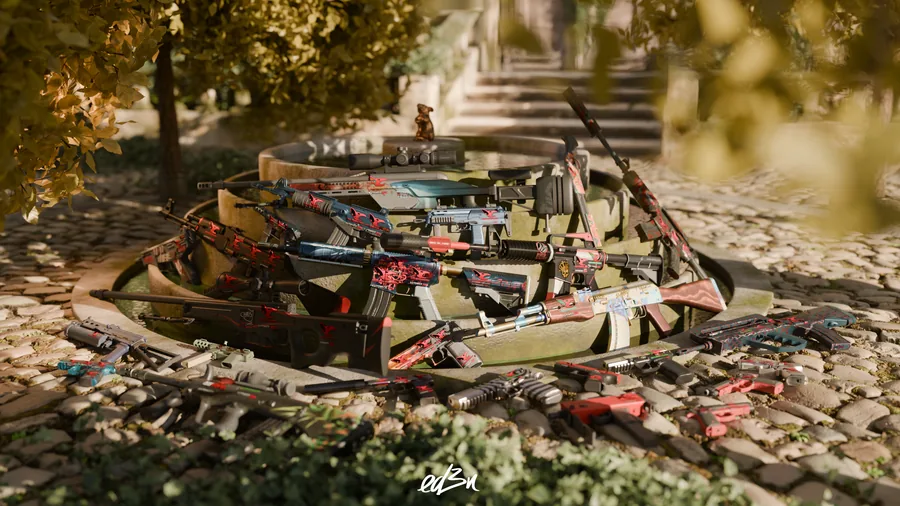
cs.weapon spawns CS2 weapons, knives and gloves with any skin, pattern and float, plus StatTrak, name tag, stickers and charms.
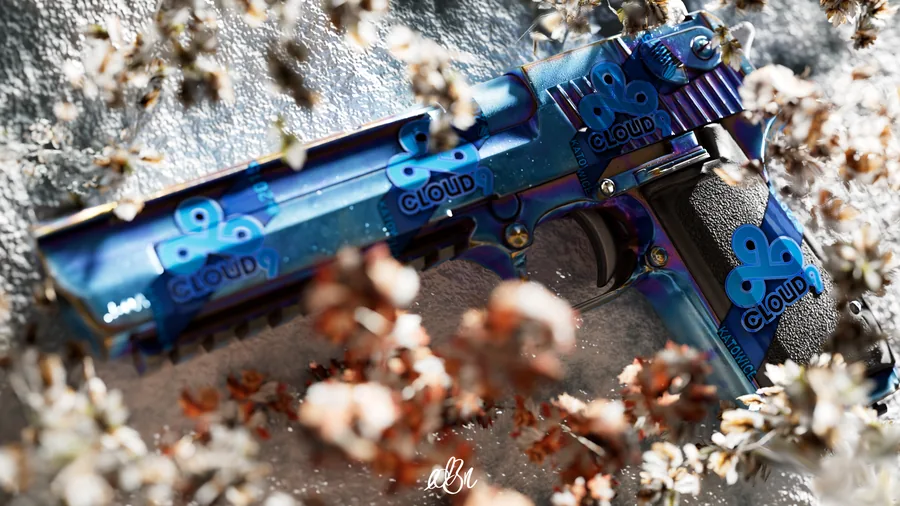
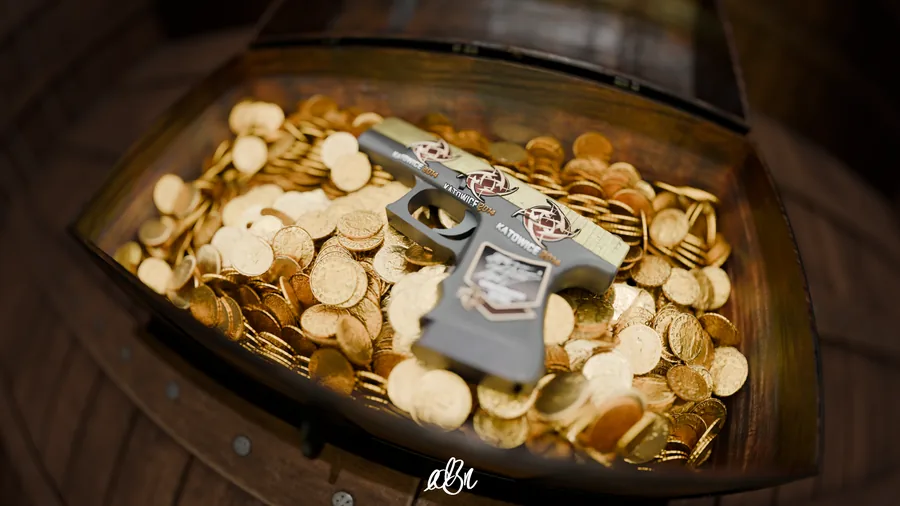
cs.sticker places CS2 stickers on a mesh. paper, glitter, holo, foil, gold, lenticular and embroidered each get their own material, with wear.
cs.charm spawns CS2 charms with their pattern. they hang on the weapon and can swing.
install, step by step
every addon works on its own: install one, two or all three. there are two ways, both end with the same addon in Blender.
- with CS2: the addon comes free from GitHub, the weapons, stickers or charms come out of your own CS2 installation. you need Windows, Blender 4.5 or newer (from blender.org or Steam), CS2 installed through Steam and enough free space. no extra python, no extra tools.
- without CS2: the all zips on the addon pages bring the whole library along. you only need Blender.
install with CS2
the steps use cs.weapon as the example. for cs.sticker or cs.charm it is the same, only the names change: see the table below.
-
download two zips from GitHub
open github.com/ed3ntim/cs.weapon. you need two downloads from this page:
- the addon: on the right click the release under Releases, then under Assets click
cs_weapon.zip. - the exporter: back on the main page click the green Code button, then Download ZIP. you get
cs.weapon-main.zip.
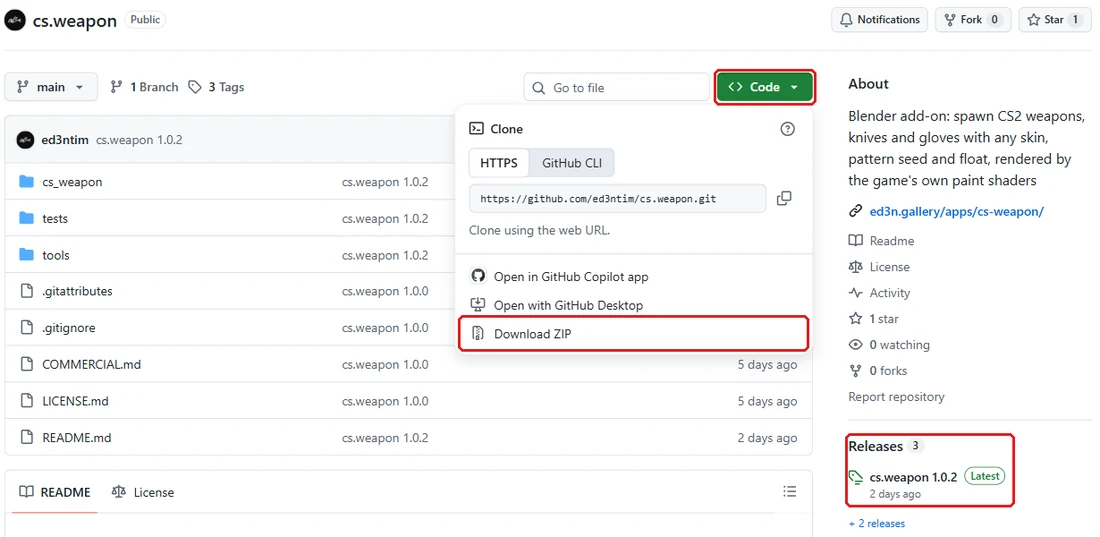
Code, Download ZIP for the exporter, Releases for the addon 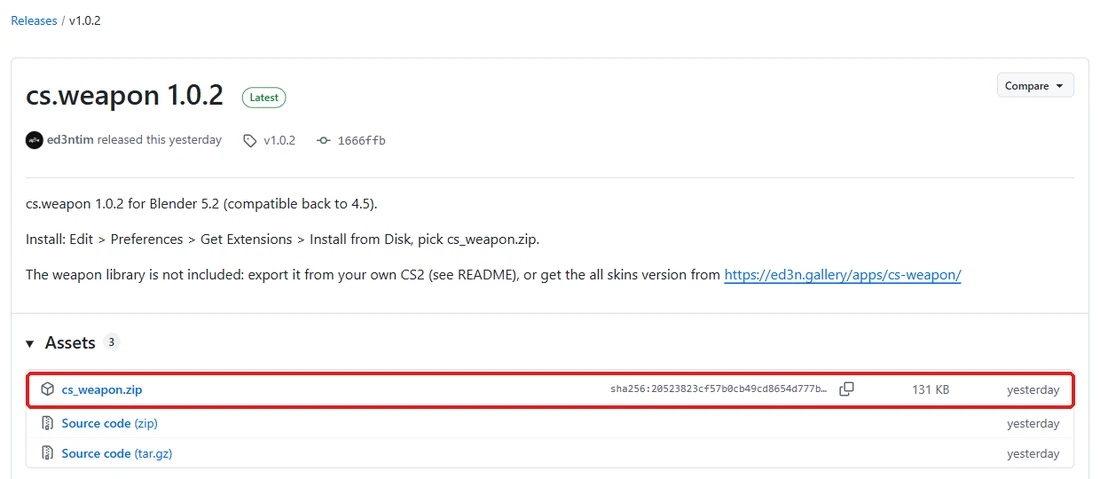
release page, Assets: cs_weapon.zipboth zips land in your Downloads folder.
- the addon: on the right click the release under Releases, then under Assets click
-
install the addon in Blender
start Blender. in the menu at the top left: Edit, Preferences.... on the left click Get Extensions. the first time Blender asks about online access: Continue Offline is enough.
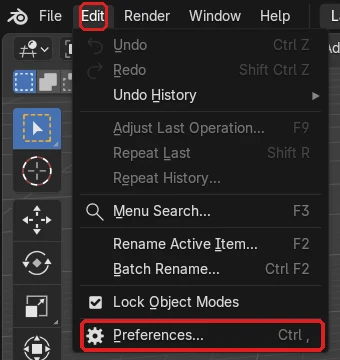
Edit, Preferences... 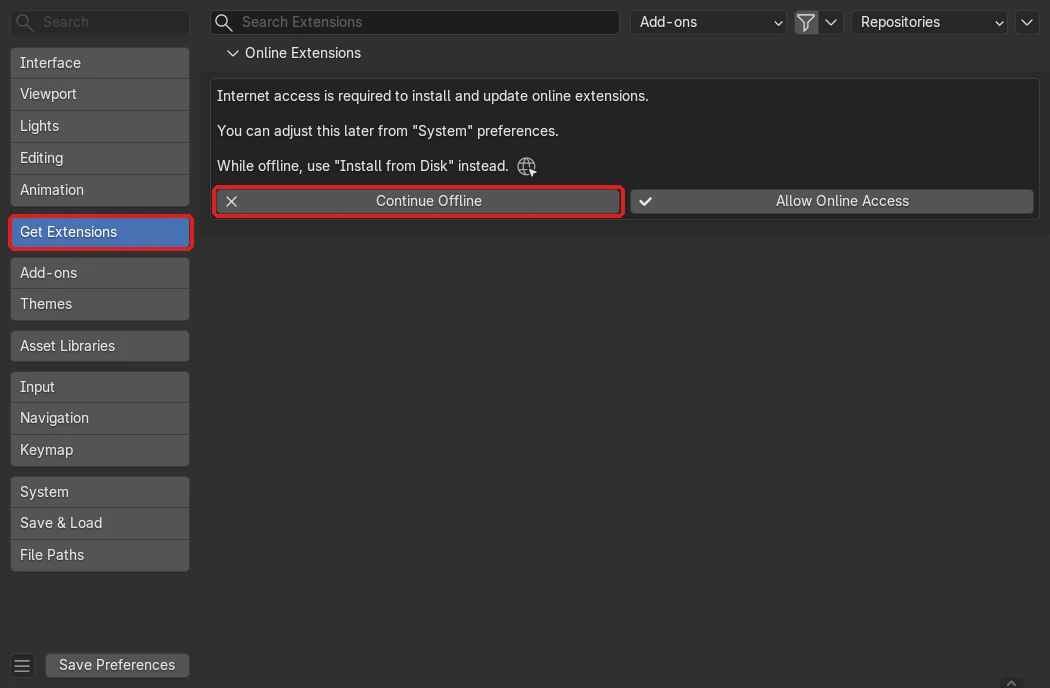
Get Extensions, Continue Offline click the small arrow at the top right, choose Install from Disk..., go to Downloads, click
cs_weapon.ziponce (notcs.weapon-main.zip) and click Install from Disk. leave Enable on Install ticked.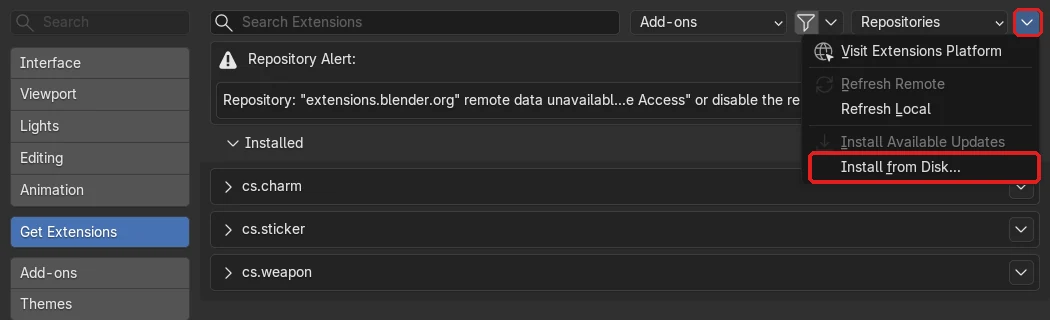
arrow at the top right, Install from Disk... 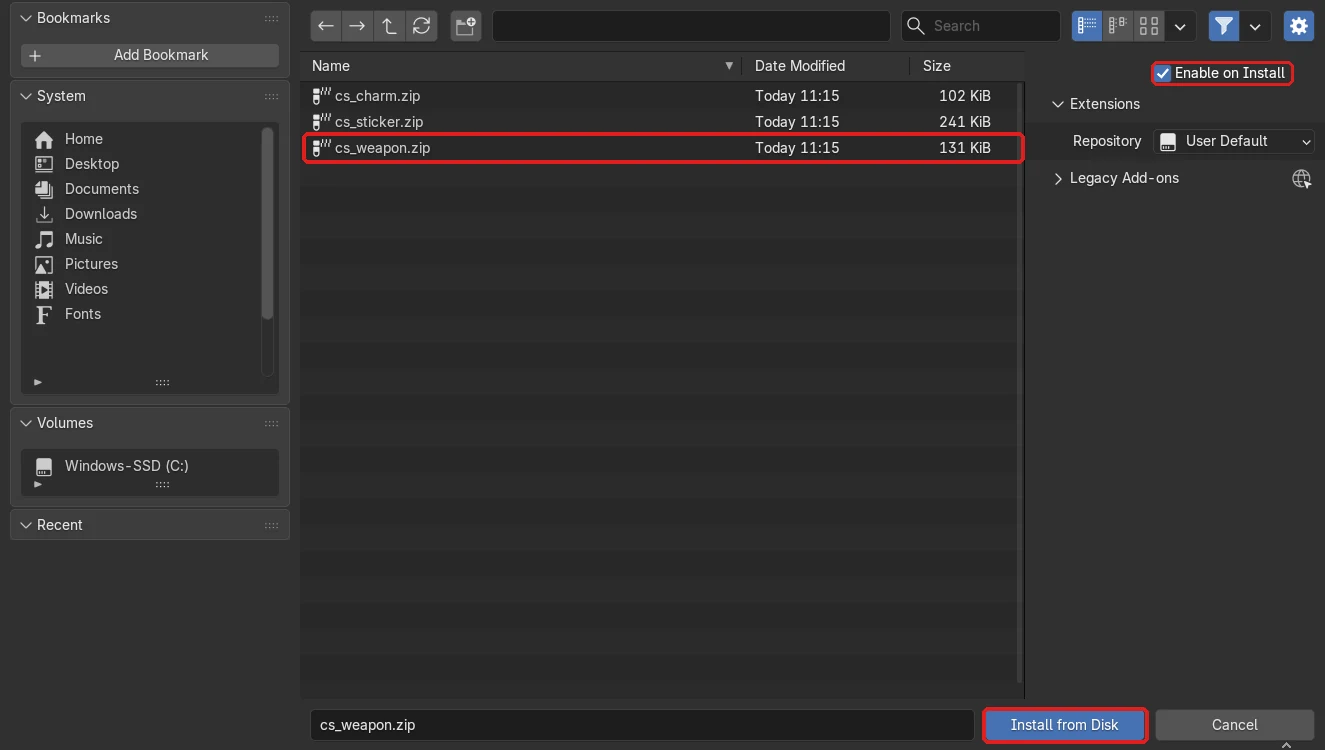
cs_weapon.zip, Enable on Install, Install from Diskthe tab is there now, but still empty: the library comes next. leave Blender open.
-
unpack the exporter
open your Downloads folder in the Windows Explorer. right click
cs.weapon-main.zip, choose Extract All... (German Windows: Alle extrahieren...) and click Extract. a new foldercs.weapon-mainopens. if there is anothercs.weapon-mainfolder inside, open it too, until you see the folderscs_weaponandtools.now click into the address bar at the top of the Explorer window (where the folder path is), type
powershelland press Enter. a blue or black PowerShell window opens, already in this folder. -
export the library from CS2
the exporter reads the models and textures straight out of your CS2 files. CS2 does not have to run, but it must not be updating in Steam right now.
copy this block (the copy button), paste it into PowerShell with a right click and press Enter. it finds the python that comes with Blender (also a Blender from Steam) and adds two small packages to it. the first line of the answer shows which Blender it found.
$roots = @("$env:ProgramFiles\Blender Foundation") $steam = (Get-ItemProperty HKCU:\Software\Valve\Steam -ErrorAction SilentlyContinue).SteamPath if ($steam) { $roots += Select-String "$steam\steamapps\libraryfolders.vdf" -Pattern '"path"\s+"(.+)"' | ForEach-Object { $_.Matches[0].Groups[1].Value.Replace("\\", "\") + "\steamapps\common\Blender" } } $py = (Get-ChildItem $roots -Filter python.exe -Recurse -Depth 4 -ErrorAction SilentlyContinue | Where-Object FullName -like "*\python\bin\python.exe" | Sort-Object { [version]$_.Directory.Parent.Parent.Name } | Select-Object -Last 1).FullName if ($py) { "Blender python: $py"; & $py -m pip install --user zstandard pillow } else { Write-Host "Blender not found" -ForegroundColor Red }then, in the same window, the export. it puts the library into
C:\cs2\weaponsand runs until PowerShell shows its prompt (PS C:\...>) again, for the weapons from half an hour to a few hours.& $py tools\export_cs2_weapons.py --out C:\cs2\weapons --download-s2v
the weapons take about 15 GB. less space: add
--max-texture-size 2048at the end, that halves the size, close-ups lose a little detail. -
show the addon its library
back in Blender: Edit, Preferences..., Add-ons. click the small arrow in front of cs.weapon to open its settings. click into the field Weapon Library Folder, type
C:\cs2\weaponsand press Enter. close the preferences, the setting is saved on its own.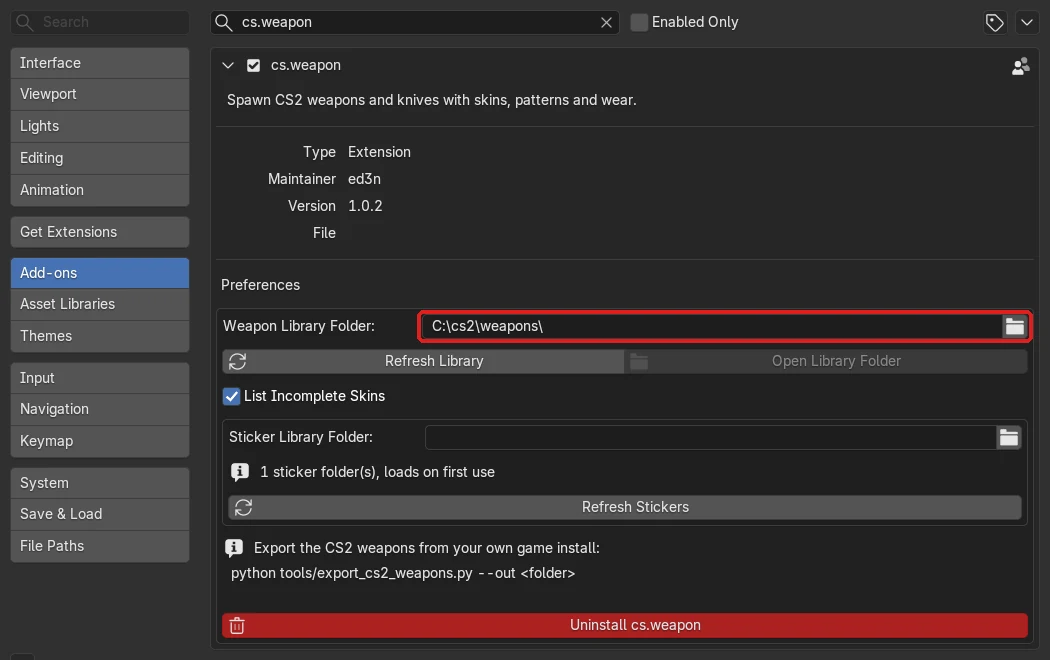
cs.weapon, Weapon Library Folder leave the field Sticker Library Folder empty: with cs.sticker installed, cs.weapon finds its stickers on its own.
-
spawn
move the mouse over the 3D view and press N. on the right edge of the sidebar is the tab cs.weapon. pick a skin from the list (the search field helps) and click Spawn Weapon. to see the skin, switch the 3D view to material preview (Z, Material Preview).
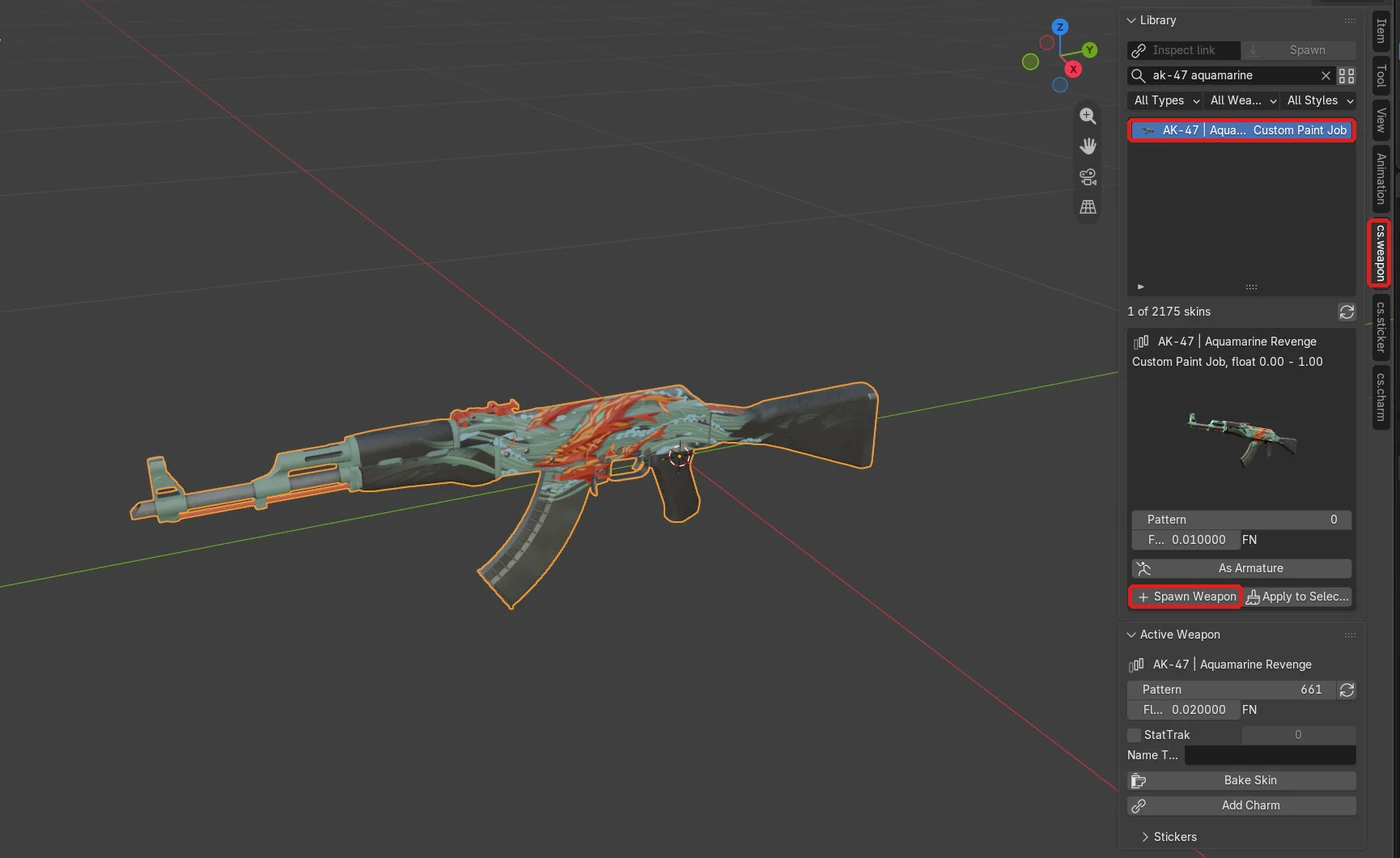
tab cs.weapon, skin in the list, Spawn Weapon cs.sticker and cs.charm have their own tabs next to it. here the sticker Titan (Holo) | Katowice 2014 is picked:
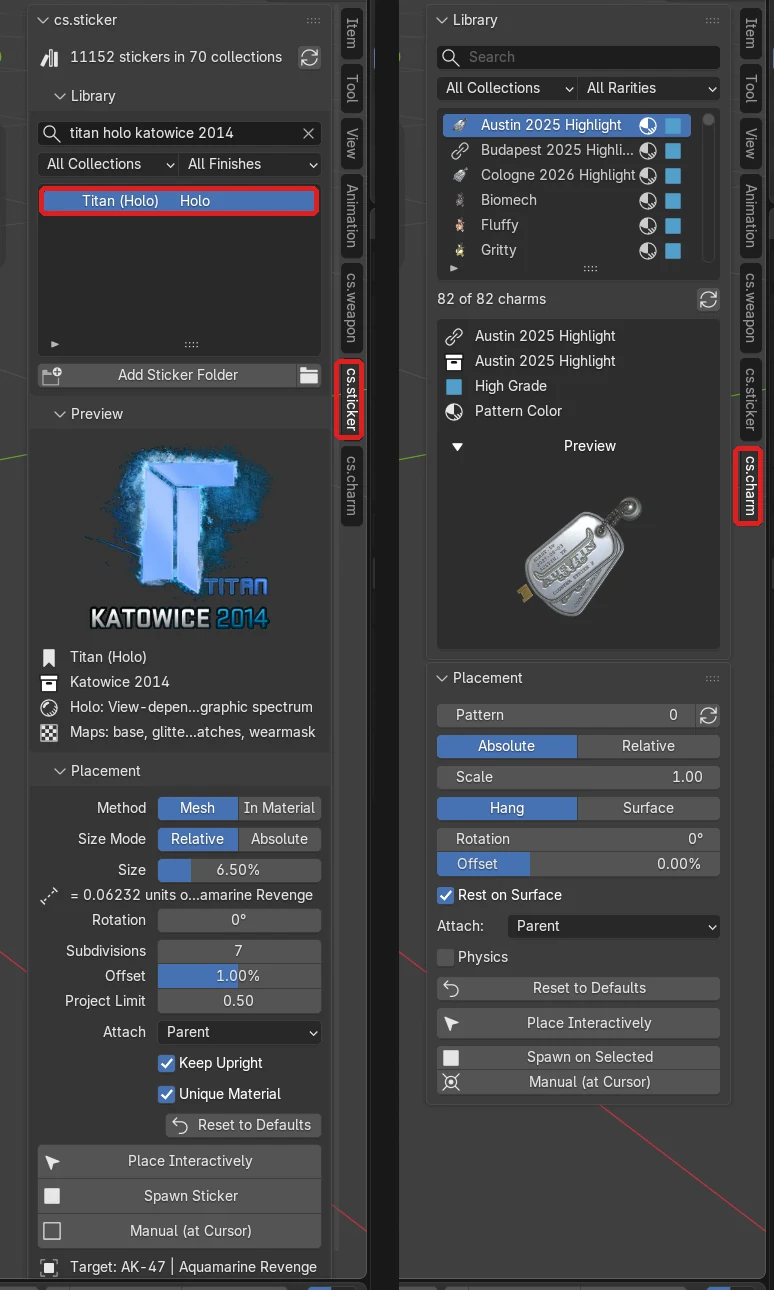
the tabs cs.sticker and cs.charm after a CS2 update with new items: open PowerShell in the exporter folder again (step 3) and paste both blocks again. the library folder stays the same, Blender picks up the new items.
the names for each addon
| cs.weapon | cs.sticker | cs.charm | |
|---|---|---|---|
| GitHub | cs.weapon | cs.sticker | cs.charm |
| addon (Assets) | cs_weapon.zip | cs_sticker.zip | cs_charm.zip |
| exporter (Download ZIP) | cs.weapon-main.zip | cs.sticker-main.zip | cs.charm-main.zip |
| export, second block | & $py tools\export_cs2_weapons.py --out C:\cs2\weapons --download-s2v |
& $py tools\export_cs2_stickers.py --out C:\cs2\stickers --download-s2v |
& $py tools\export_cs2_charms.py --out C:\cs2\charms --download-s2v |
| size, time | about 15 GB, up to a few hours | about 7 GB, about half an hour | about 250 MB, a few minutes |
| field in the settings | Weapon Library Folder | User Sticker Folder | Charm Library Folder |
install without CS2
-
download the all zip
open the page of the addon (cs.weapon, cs.sticker, cs.charm) and click the all button. for cs.weapon pick one of the two: all skins 2048px (about 9 GB, enough for most renders) or all skins full res (about 17 GB, for close-ups). cs.sticker is about 7 GB, cs.charm about 250 MB. keep about twice the zip size free on your drive.
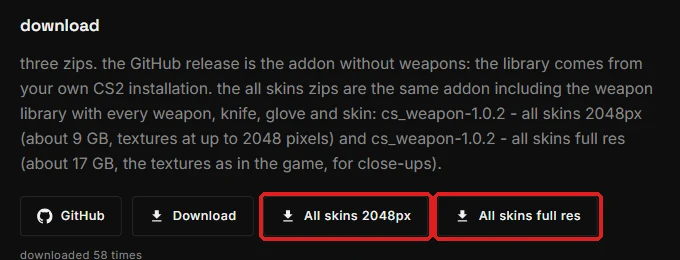
the all buttons on the app page the button opens Google Drive. click Download. Drive cannot scan files this large for viruses and asks once more: click Download anyway. do not unzip the zip.
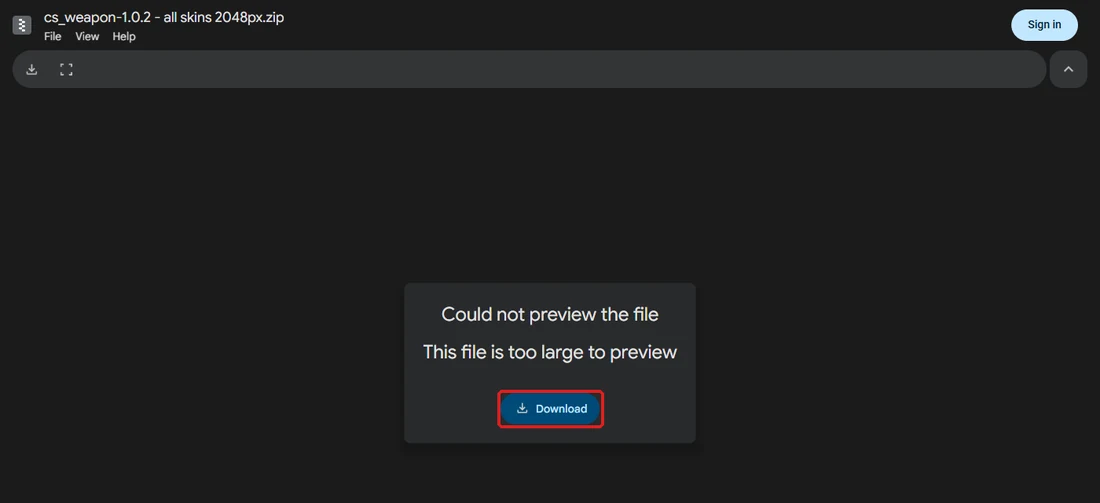
Drive: Download 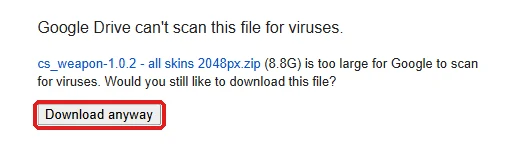
then Download anyway -
install it in Blender
exactly as in with CS2, step 2, only with the all zip. a large zip takes a few minutes and Blender looks frozen meanwhile: just wait.
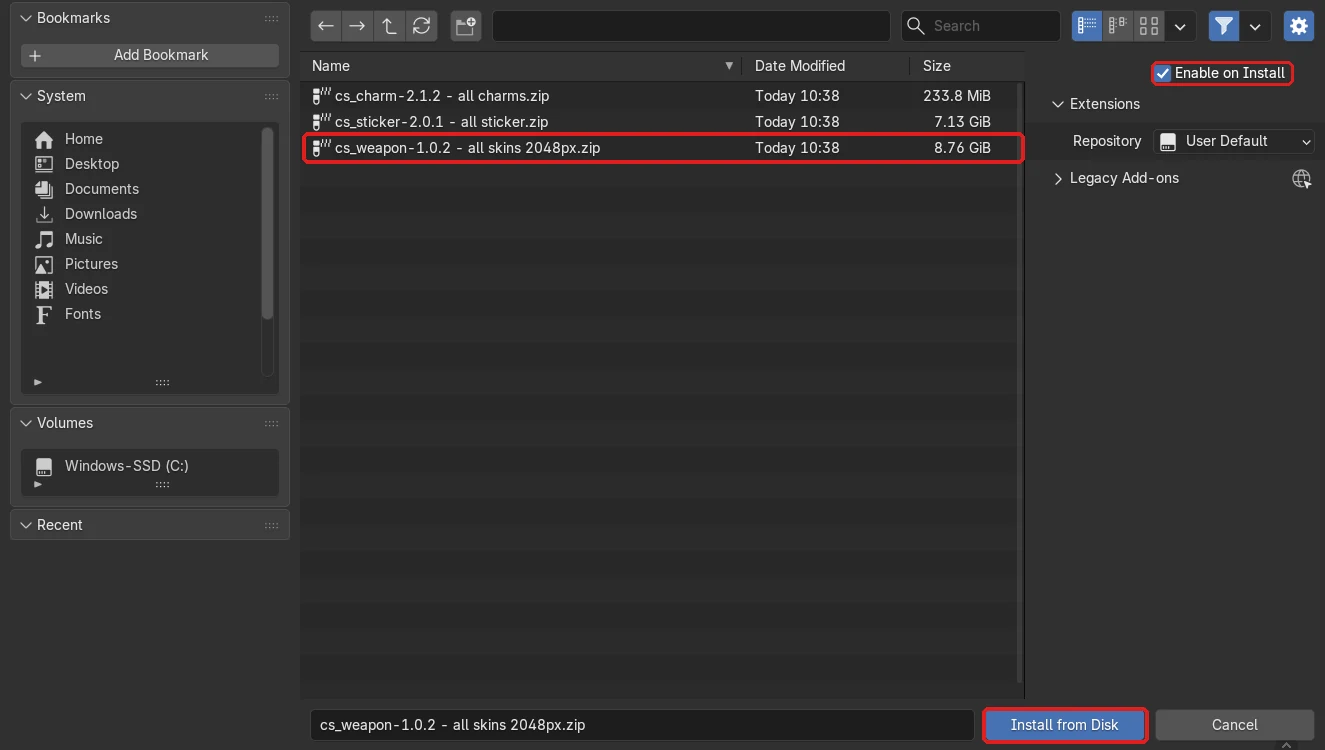
the all zip, Enable on Install, Install from Disk under Add-ons the addon is listed and ticked. there is no library folder to set, it is inside the zip.
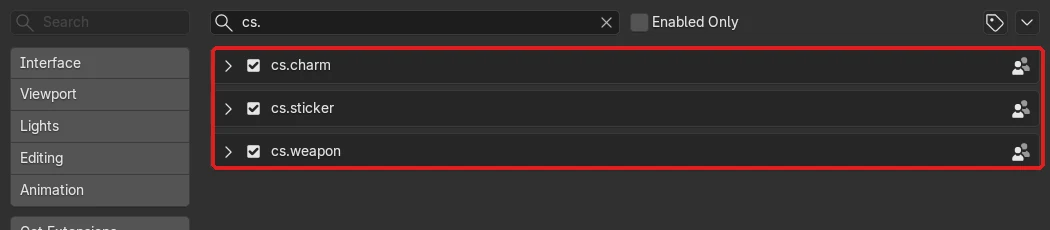
Add-ons: here all three are installed -
spawn
as in with CS2, step 6: N over the 3D view, tab cs.weapon, pick a skin, Spawn Weapon.
if something is off
- no tab in the sidebar: check under Edit, Preferences..., Add-ons that the addon is ticked, and press N with the mouse over the 3D view.
- the list is empty: the library folder is not set or points to the wrong folder (the right one has a
catalog.jsoninside). with an all zip: the GitHub zip was installed over it, install the all zip again. - PowerShell says "Blender not found": Blender is neither in
C:\Program Files\Blender Foundationnor in Steam (for example the Microsoft Store version or a portable Blender). type$py = ", the path of your Blender folder, then\5.3\python\bin\python.exe"(your Blender version), press Enter and continue with the export block. - PowerShell says "can't open file ... tools\export_...": PowerShell is not in the exporter folder. open it again from the folder that shows
tools(step 3). - CS2 not found: CS2 is in a Steam library the exporter does not find. add
--cs2 "D:\SteamLibrary\steamapps\common\Counter-Strike Global Offensive"(your path) at the end of the export block. - a new addon version: GitHub: download the new
cs_weapon.zipand install it the same way, the library folder stays. all zip: install the new one, it replaces the old one. - remove: Preferences, Add-ons, the arrow next to the addon, Uninstall. an all zip takes its library with it, an exported library in
C:\cs2stays until you delete the folder.
a render
stills from the gallery, made in blender. this kind of render is possible with the addons.